Input Fields
Input Fields are responsible for your Triggers and Actions to receive data and are crucial for your App's interactivity.
Adding Input Fields
Click on + Add Field.
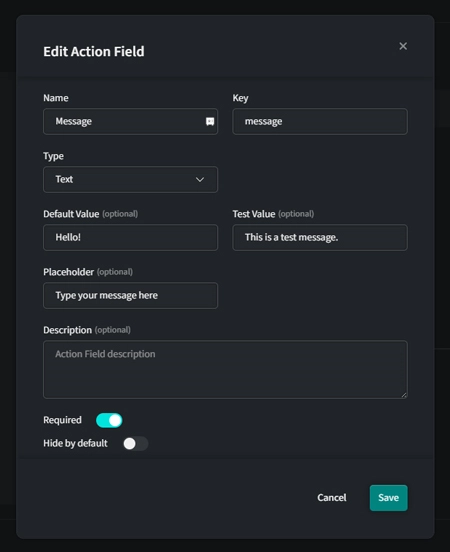
Define the following for the Input Field:
- Name: Give your Input Field a name. This will show up as the label in the Triggers/Actions right sidebar.
- Key: Initially set by the name. Used to reference the Input Field within your code. You can change this independently from the name. Changing the key will automatically apply to every iteration within your code.
- Type: Select an Input Field type (e.g., Text, Number, List, Map ... ). This will determine data validation and how the Input Field is presented in the right sidebar.
- Lists can only have one sub-item. This sub-item will define the type of all sub-items. Otherwise the list will accept every type.
- Maps can have multiple sub-items or can be a simple key-value pair (setting "Is Key-Value Pair" required).
- Placeholder: You can define an optional placeholder to be shown in the right sidebar for the Input Field.
- Test Value: Optionally you can define a test value. This is used for testing and matching of the response later on. Required fields need a test value in order for a test to work.
- Description: Add an optional description to your Input Field. This will be shown as a tooltip.
- Required: Decide whether an Input is required or not.
- Hide by default: Hides the Input Field by default. You can show the field by using Rules.
Click on Create to add the Input Field to your Trigger or Action.
Using Input Variables
To make use of your Input Fields you can insert their variables within your code. Hover over an Input Field in your list. A Button "Insert Variable" will appear. Clicking it will insert the Input Fields Variable at the position of your cursor within your code.
Lists and Maps from your Inputs can be used as a whole by inserting them directly at the highest level or you can use specific values of your Input Lists and Maps.
Example use of Input Variables in a JSON body:
{
  "myText": "{$input.my_text}",

  // Use of the entire map
  "entireMap": "{$input.my_map}",

  // Accessing specific values of your map
  "specificMap": {
    "name": "{$input.my_map.name}",
    "description": "{$input.my_map.description}"
  },
  // Use of the entire list
  "myList": "{$input.my_list}",

  // Accessing specific values within the map within the list
  "myList": [
    {
      "name": "{$input.my_list[n].name}",
      "description": "{$input.my_list[n].description}"
    }
  ]
}
Example use of Input Field Variables in a JavaScript code:
const example = {
  myText: "{$input.my_text}",

  // Use of the entire map
  entireMap: "{$input.my_map}",

  // Accessing specific values of your map
  specificMap: {
    name: "{$input.my_map.name}",
    description: "{$input.my_map.description}"
  },

  // Use of the entire list
  myList: "{$input.my_list}",

  // Accessing specific values within the map within the list
  myListDetailed: [
    {
      name: "{$input.my_list[n].name}",
      description: "{$input.my_list[n].description}"
    }
  ]
};
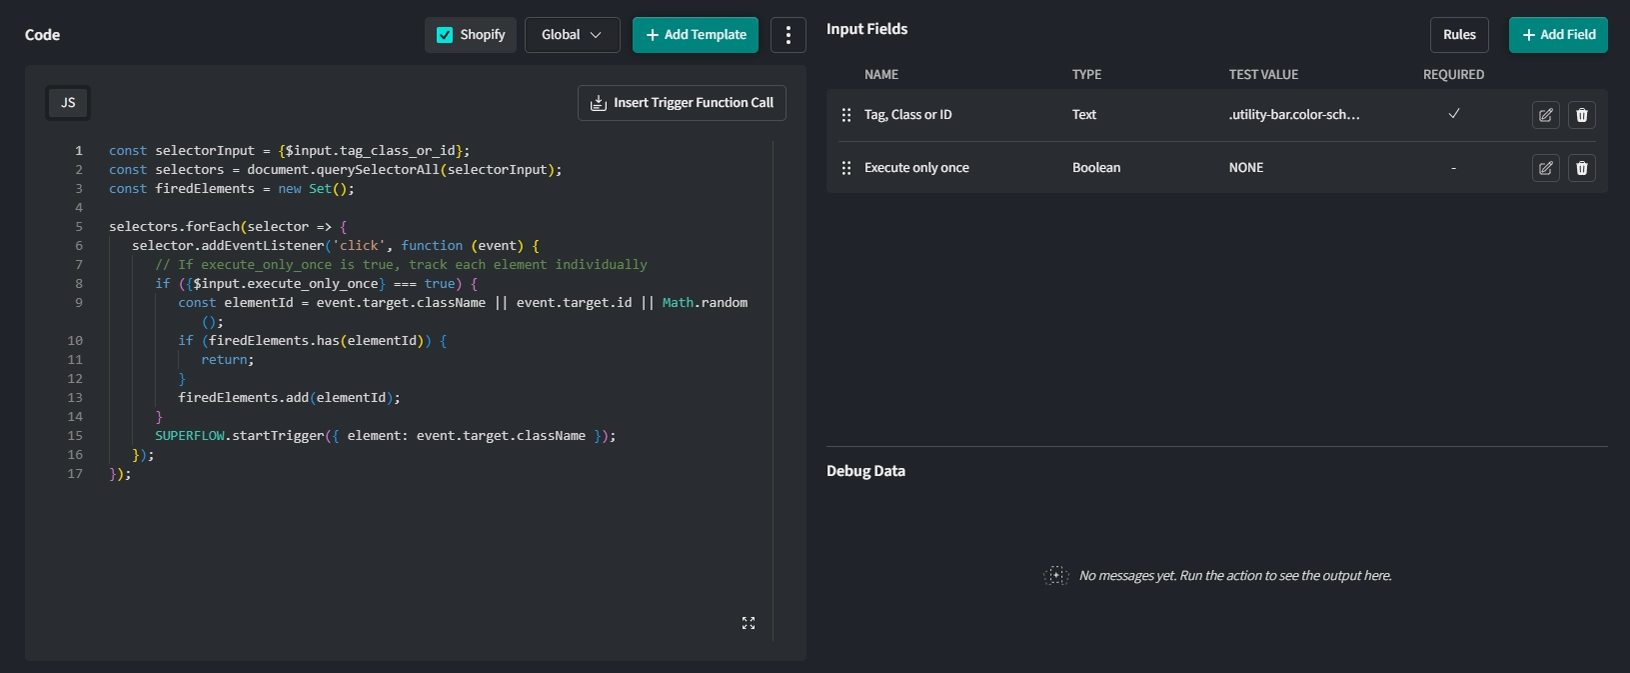
The following example shows the code and Input Fields for a Click-Trigger. Note how it is equipped with an Input Field to determine the clicked element and how it is implemented in the code.