Input Rules
Input Rules allow you to dynamically adjust your Input Fields based on the values set in other Input Fields. This is especially useful when working with Triggers and Actions that offer a lot of options and have Input Fields that are only relevant when a certain option is selected or a condition is met.
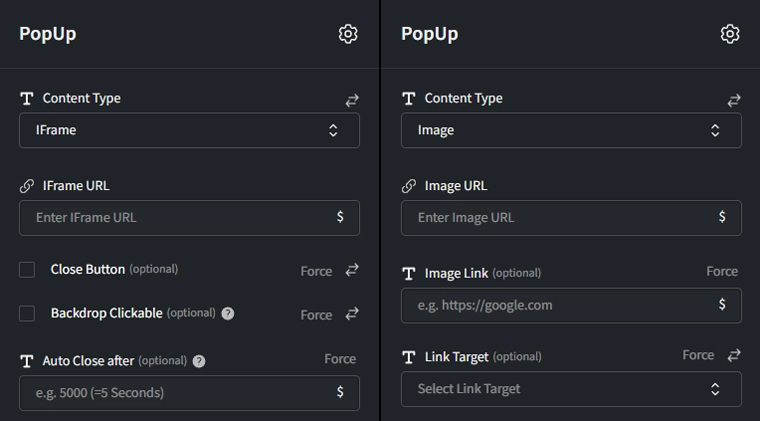
In the example below you can see how relevant fields are shown and irrelevant ones are hidden, based on the selected Content Type.
Adding Input Rules
info
Note that in order to create Input Rules you need Input Fields first.
- Open the Trigger or Action's settings dialog by clicking on
Editor create a new one. - On the right side of the Input Fields section click on
Rules. - Click
+ Create Rule. - Name: Choose a name that best describes the Rule you want to create.
- IF: Here you can set the condition that will invoke your Rule. You can set multiple conditions by clicking
+ Add Condition.- Field: Choose which Input Field's value you want to observe.
- Operator: Choose how the Input Field's value will be evaluated or compared.
- Value: A value the Input Field's value will be compared to.
- THEN: Specify what should happen when the above condition is met. You can set multiple actions by clicking
+ Add Action.- Set the action to be performed on an Input Field, such as show, hide, or set as required.
- Select the Input Field to which the action should apply.
- Click
Create, close the Input Rules list and save your Trigger or Action.