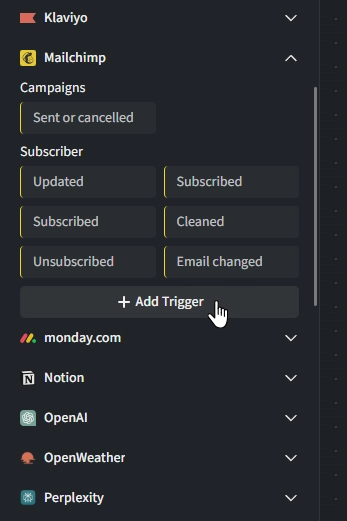
Provider Triggers
Provider Triggers are reusable webhook subscriptions you can use to trigger your flow by a specific event of virtually any Provider as long as it offers API connectivity.
Superflow comes pre-stacked with a wide variety of Providers and Provider Triggers however, you can add your own Custom Provider and Custom Provider Trigger with ease. You can define which webhook you want to subscribe to, Input Fields, Conditions and the expected return values.
Add a Custom Provider Trigger
Adding Custom Provider Triggers is only supported for Providers that support webhook registration via API!
- Navigate to the Flow Builders Triggers tab and scroll down to Provider Triggers.
- Click
+ Add Triggerunderneath the Provider you want to add your Trigger to.
Basic Information
- Display Name: Enter the name of the Trigger (e.g., "User subscribed"). Note that special characters are prohibited.
- Short Name: Enter the name of the Trigger shown in the left sidebar (e.g., "Subscribed").
- Description (optional): Provide a brief description, such as "When someone subscribes to newsletter".
- Subcategory: Select a subcategory that best fits the Trigger’s functionality. You can create your own subcategory by clicking
+.
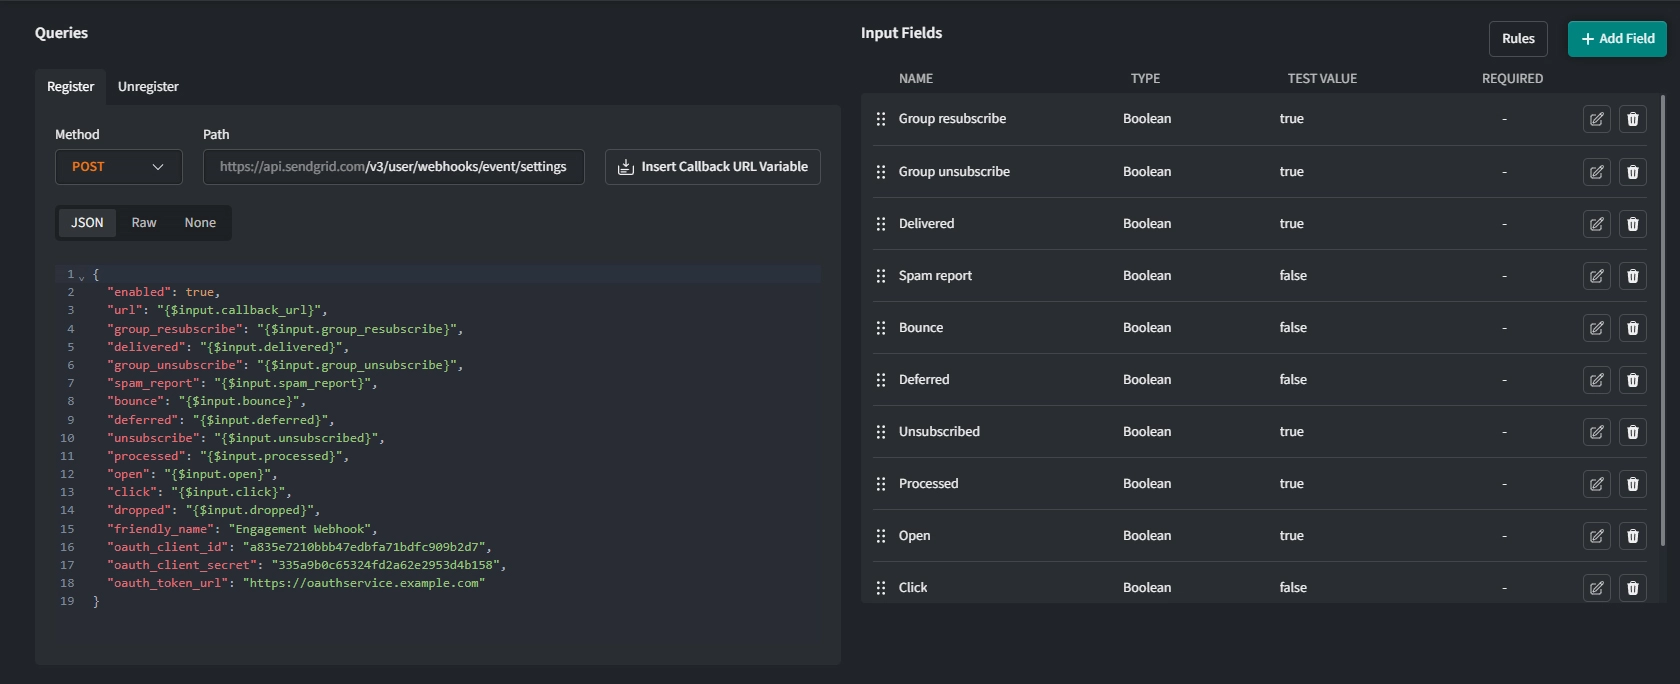
Queries
Provide queries for Register and Unregister according to the Provider's specifications.
Register
- Method: Choose the required method. This is usually POST.
- Path: The path your webhook registration request will be sent to. Refer to the Provider's documentation for further information.
- Body: Specify the webhook registration request according to the Provider's requirements. Refer to the Provider's documentation for further information.
When setting up the registration request, the Callback URL provided by Superflow is required. You can simply insert it using Insert Callback URL Variable in either the path or the body, depending on the Provider's requirements.
Unregister
- Method: Choose the required method. This is usually DELETE.
- Path: The path your webhook unregister request will be sent to. Refer to the Provider's documentation for further information.
- Body: Specify the webhook unregister request according to the Provider's requirements. This might remain empty, if the webhook id is provided via the path. Refer to the Provider's documentation for further information.
When setting up the unregistration request, the Webhook ID specified by the Provider is required. See Webhook ID Path and ensure Webhook ID is specified. You can simply insert it using Insert Webhook ID Variable in either the path or the body, depending on the Provider's requirements.
Use of Variables
You can use Provider Parameters and Variables (drag & drop) within your schema as well as Input Variables from your Input Fields (Insert Variable in input list).
Modifying Variables with Modifiers
When working with Provider Variables or Input Variables you can take advantage of Modifiers.
Input Fields
Some Providers allow for filtering which data you subscribe to or even let you set conditions that need to be met for the webhook to be updated. To make dynamic use of these capabilities, equip your Trigger with Input Fields.
The following example shows a webhook registration request for SendGrid. Note how the Input Variables are implemented into the request to make the Trigger customizable using its Input Fields.
Registration Test
- Select the Provider connection you want to register the webhook at or create a new one.
- Click
Test Register Webhook.
Once the webhook registration is completed, details about the webhook subscription will be shown below in the tabs Body, Headers and Request. Any errors the Provider might report will be shown here as well. Refer to the Provider's documentation for further information.
Webhook ID Path
In order to successfully unregister the webhook Superflow needs to identify your webhook's id specified by the Provider. In the request body look for id or something similar. Enter the path and key. This usually simply is id.
Webhook Response
As soon as you successfully registered the webhook subscription, Superflow will start "listening", waiting for the webhook to respond.
Perform an action at the Provider that will trigger the webhook.
Once triggered you will see the webhook's response.
Unregistration Test
In order for your Trigger to work properly, it must be able to unregister the webhook. Make sure Unregister and Webhook ID Path is set up correctly and click Test Unregister Webhook. Any errors the Provider might report will be shown in the body. Unregistering a webhook successfully usually returns an empty body.
Save & Publish
Once all configurations are complete and both Register and Unregister were tested successfuly, click Save to finalize your Trigger.
Note that if you changed settings of an existing Trigger, you need to republish your Apps for them to take effect.