Client Actions
Client Actions enable you to interact with a user's session. Superflow offers a wide variety of Client Actions out of the box with which you can apply coupons, manage browser data or even manipulate the website's content. Basically Client Actions are reusable encapsulations of JavaScript whose Input is defined by the user interface and returns a specific result based on that.
For Actions that do not execute in a client's session but rather on the server-side of a Provider, see Provider Actions.
Add a Custom Client Action
Custom Client Actions are managed on a Workspace level. Changes affect all Apps as soon as they are republished.
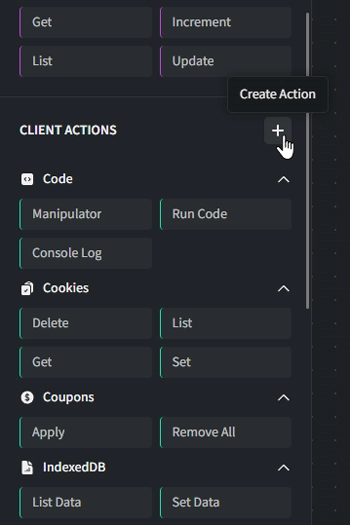
- Navigate to the Flow Builder's Actions tab and scroll down to Client Actions.
- Click
+next to "Client Actions". You can choose a subcategory later on.
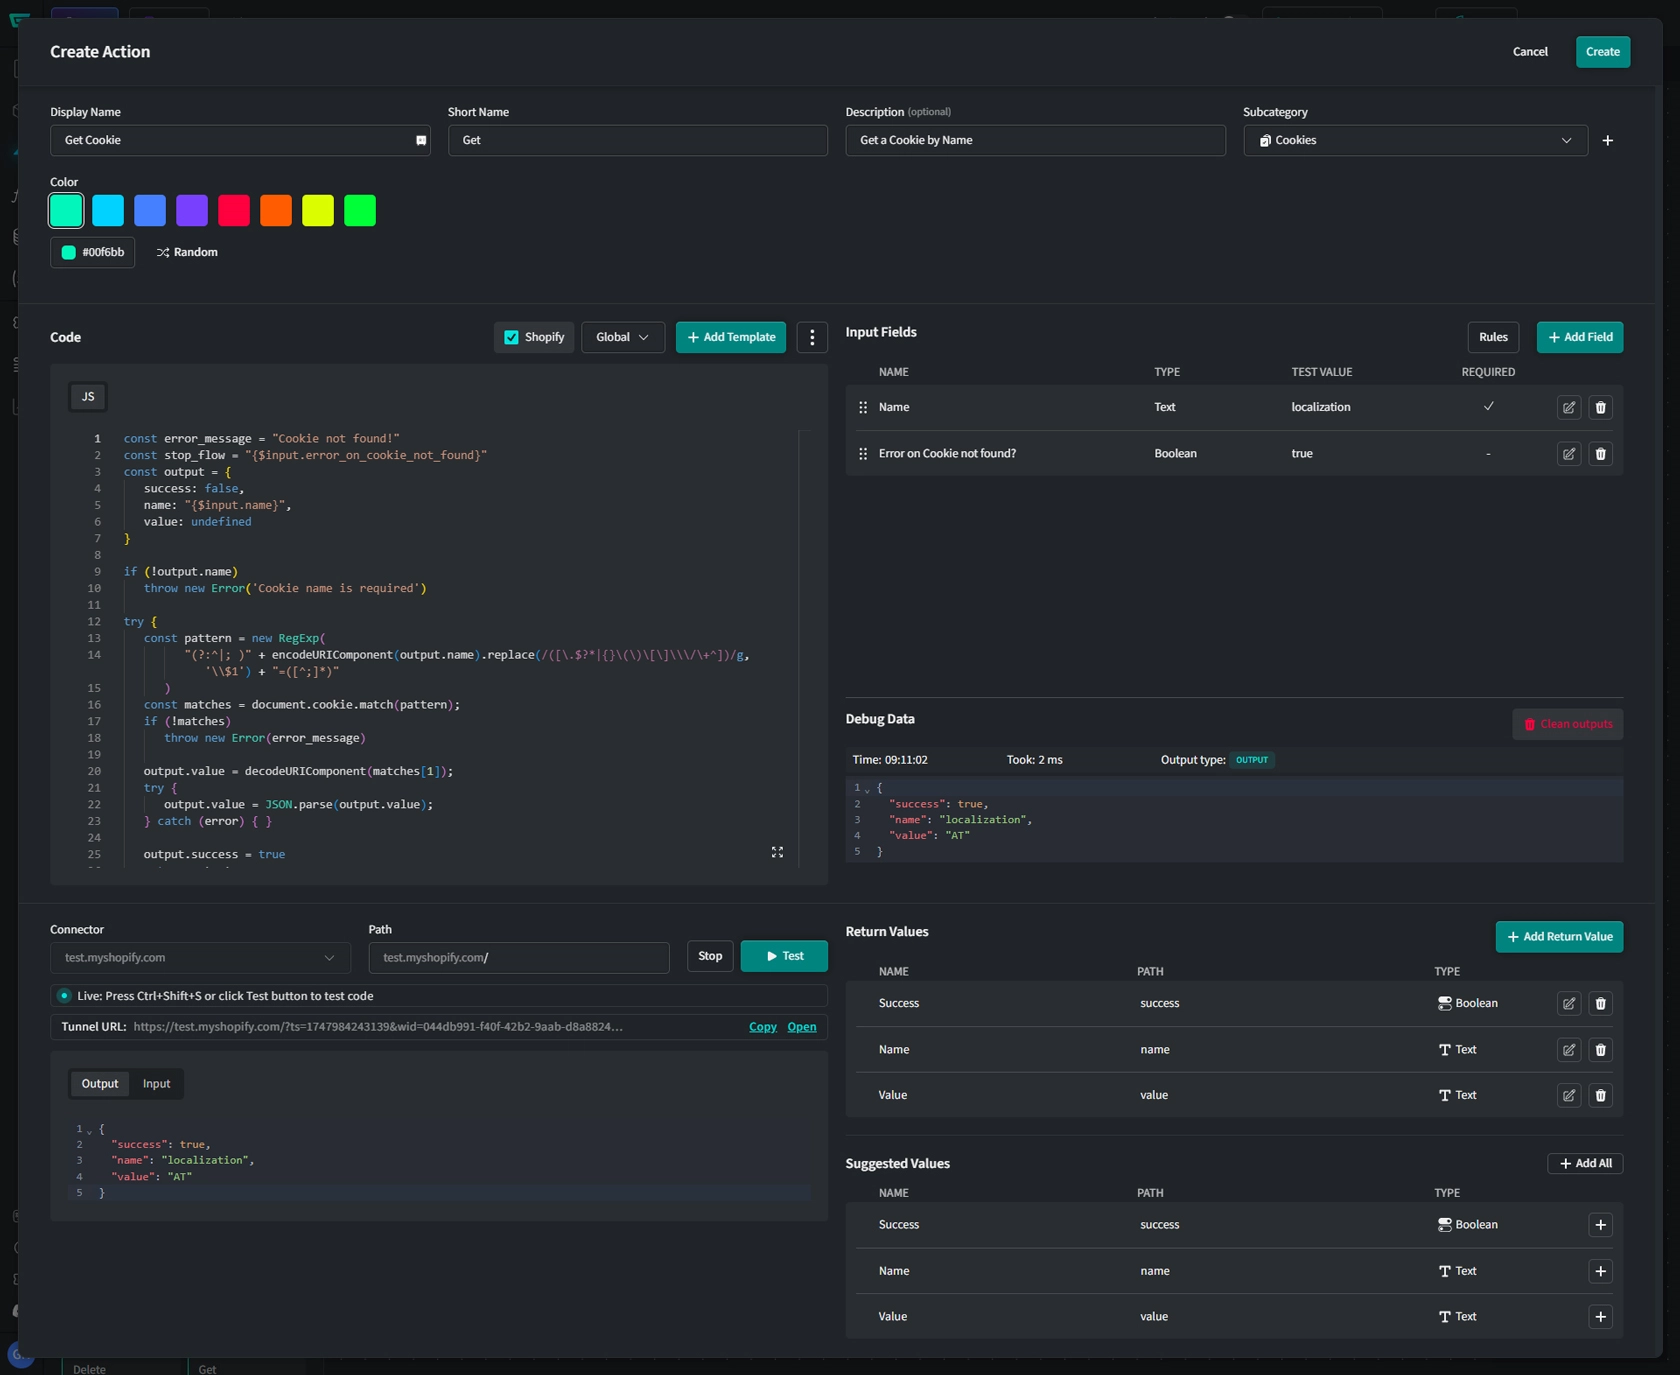
Basic Information
- Display Name: Enter the name of the Action (e.g., "Browser Alert"). Note that special characters are prohibited.
- Short Name: Enter the name of the Action shown in the left sidebar (e.g., "Alert").
- Description (optional): Provide a brief description, such as "Displays a browser alert".
- Subcategory: Select a subcategory that best fits the Action's functionality. You can also create your own subcategory by clicking
+. - Color: Choose the color your Action will be highlighted with or click
Randomto auto-select one.
Code
Provide valid JavaScript code that the action will inject into the session. You can use Input Field Variables to make your Action more dynamic.
Templates
You can use templates to add different code and assign them to different platforms. The Action will execute the code for the platform it is associated with. This is especially useful to increase your Action's compatibility and circumvents the need to create multiple Actions with the same use.
Input Fields
To ensure your Action can handle data dynamicly, make use of Input Fields.
Response
Once you have configured all the fields and settings above, you can test your Action with your test data.
-
Connector: Choose which Connector should be used to test your Action. Connections from your installed Connectors are available.
-
Path: By default, the path is set as the base url of your Connector. If your Action is tailored to run on a page other than the homepage, append it accordingly (e.g.: /Cart).
Click Start Test Server
A temporary testing session with your Actions's code will be mounted. Click on Open to launch the session in your browser.
- Output Here you will see the output of your Actions's JavaScript.
- Input Here you will see which data was provided to the Action's JavaScript by the test run.
Return Values
Return values are the expected return values of your Action's JavaScript. These values can be passed to the next steps within Flows and are useful when you need to process data of your request within your App's logic.
You can add return values manually but using the Suggested Values Section (available after a successful test) is much more convenient. However, if the response does not include all the possible return values, adding them manually might be necessary.
Save & Publish
Once all configurations are complete, click Save to finalize your Action.
Note that if you changed settings of an existing Action, you need to republish your Apps for them to take effect.