Provider Actions
Provider Actions are reusable API endpoints of a specific Provider that enable you execute actions on virtually any Provider as long as it offers API connectivity.
Superflow comes pre-stacked with a wide variety of Providers and Provider Actions however, you can add your own Custom Provider and Custom Provider Actions with ease. You can define the path, Input Fields and the expected return values.
Note that in order to use Provider Actions, you must first establish a connection. To do so, navigate to the desired Provider in either the Triggers or Actions tab, click Connections, and create a new connection.
Add a Custom Provider Action
Providers and Actions are managed on a Workspace level. Changes affect all Apps as soon as they are republished.
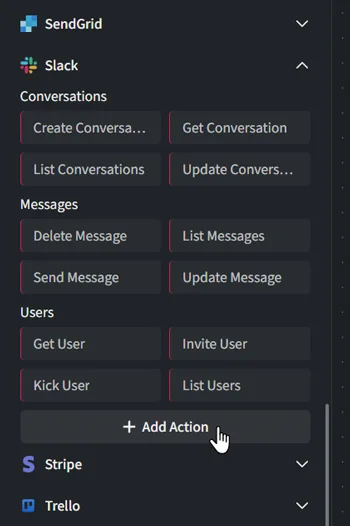
- Navigate to the Flow Builders Actions tab and scroll down to Provider Actions.
- Click
+ Add Actionunderneath the Provider you want to add your Action to.
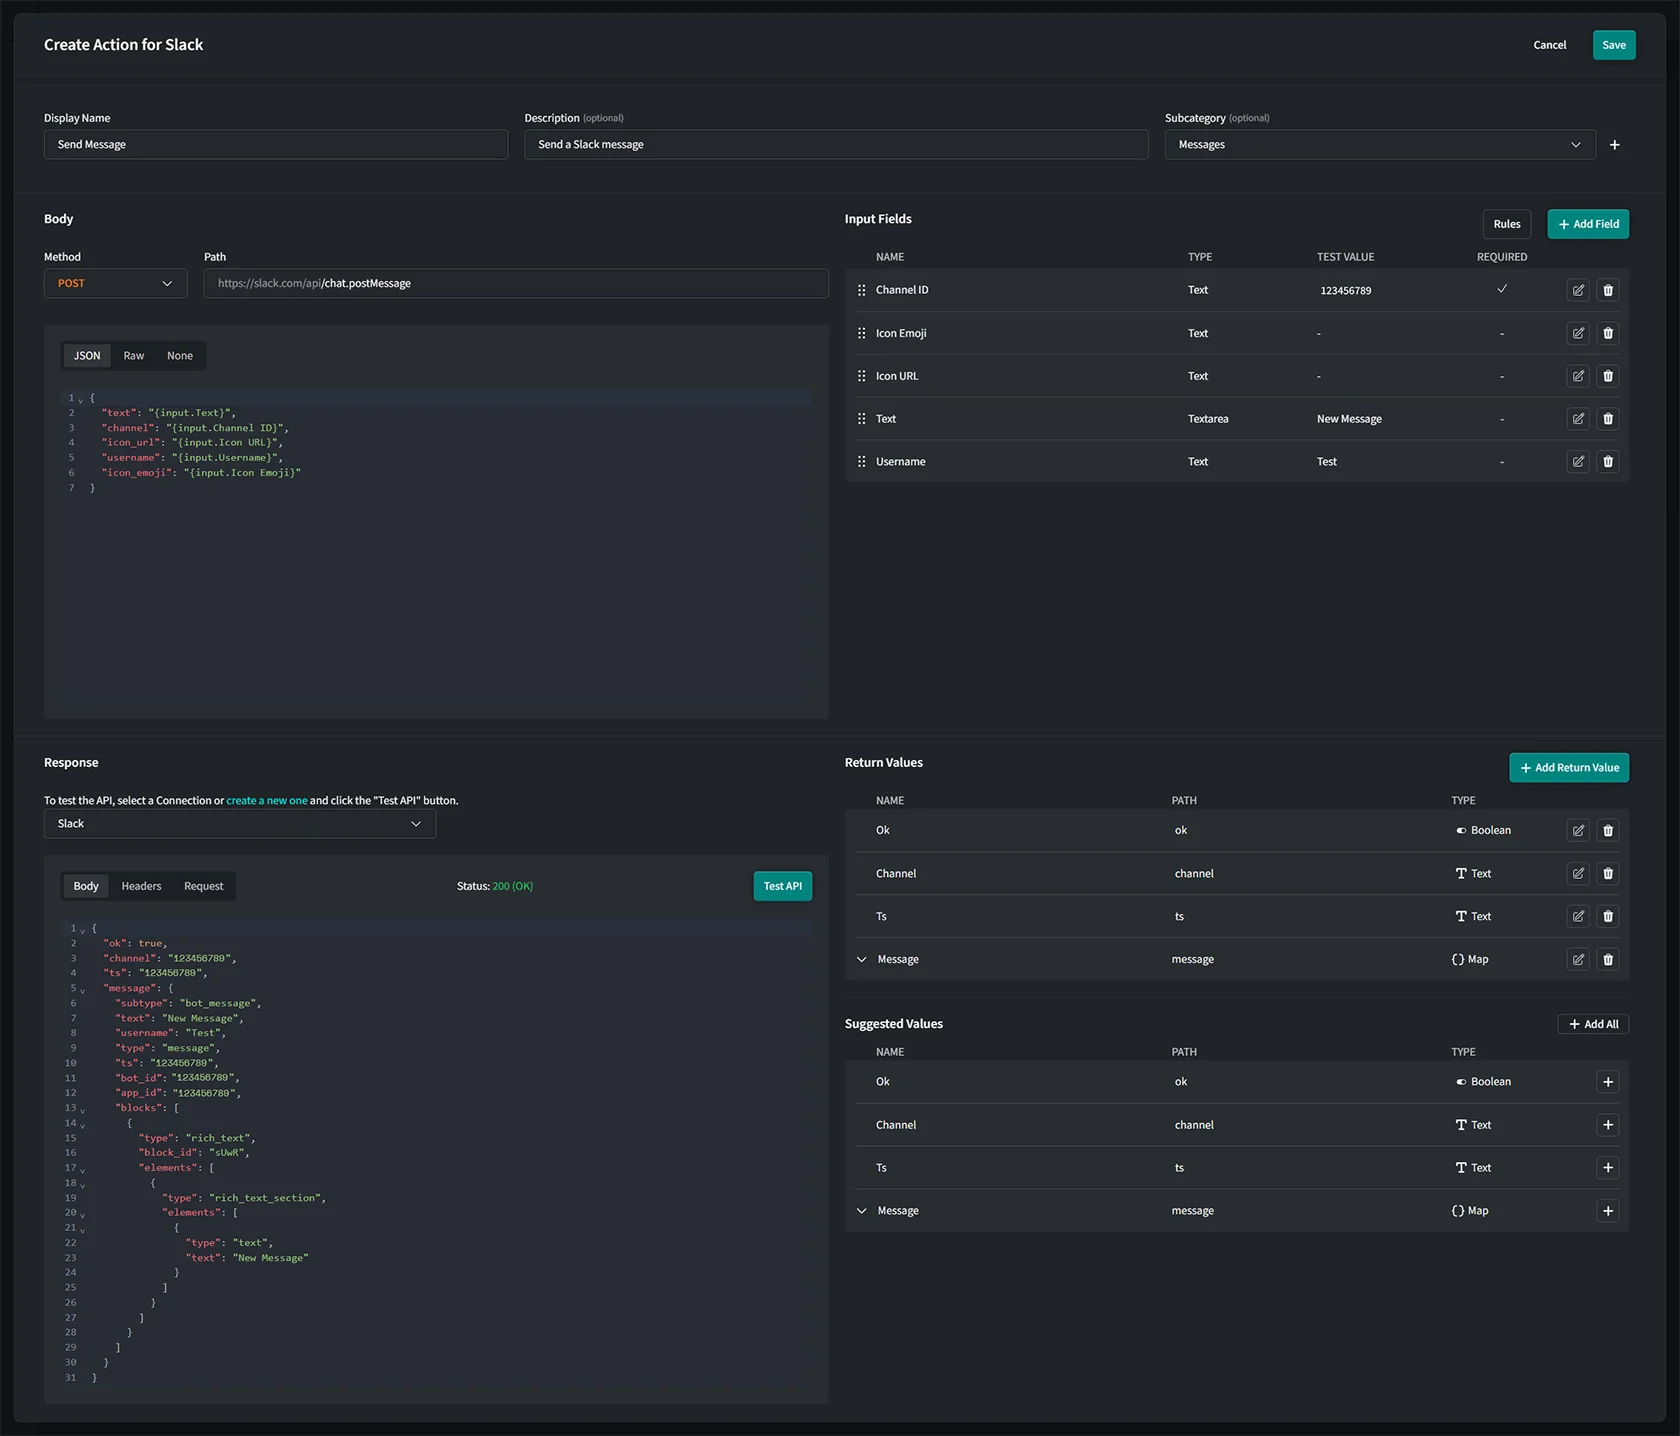
Basic Information
- Display Name: Enter the name of the Action (e.g., "Send Message"). Note that special characters are prohibited.
- Short Name: Enter the name of the Action shown in the left sidebar (e.g., "Send").
- Description (optional): Provide a brief description, such as "Send a Slack message".
- Subcategory: Select a subcategory that best fits the Action’s functionality. You can also create your own subcategory by clicking
+.
Body
- Method: Define the method of the API request (not available with GraphQL).
- Path: Define the path for the API request. Be sure to start your path with a backslash ("/"). You can use Provider parameters and variables (drag & drop) within your path as well as Input Variables from your Input Fields ("Insert Variable" button in input list).
- Type: Select the type of your body (e.g. JSON, Raw, None). When "None" is selected, no body will be sent.
Once you have selected the type of your body, you can define the payload of the body itself.
Use of Variables
You can use Provider parameters and variables (drag & drop) within your schema as well as Input Variables from your Input Fields ( Insert Variable in input list).
Modifying Variables with Modifiers
When working with Provider- or Input-Variables you can take advantage of Modifiers.
Input Fields
To ensure your Action can handle data dynamicly, make use of Input Fields.
Response
Once you have configured all the fields and settings above, you can test your request with your test data and get a response from your API Provider.
- Connection: Select a Provider Connection or create a new one (credentials for your API connection). Connections that have already been established with the Provider are available.
- Click
Test API
- Body Here you will see the response body from your API Provider.
- Header Here you will see the header of the response.
- Request This shows you what exactly was sent to the API.
Return Values
Return values are the expected return values of your API request. These values can be passed to consecutive steps within Flows which allows you to process data of your request within your Apps logic.
You can add return values manually but using the Suggested Values Section (available after a successful test) is much more convenient. However, if the response does not include all the possible return values, adding them manually might be necessary.
Save & Publish
Once all configurations are complete, click Save to finalize your Action.
Note that if you changed settings of an existing Action, you need to republish your Apps for them to take effect.